Crochet An Icord
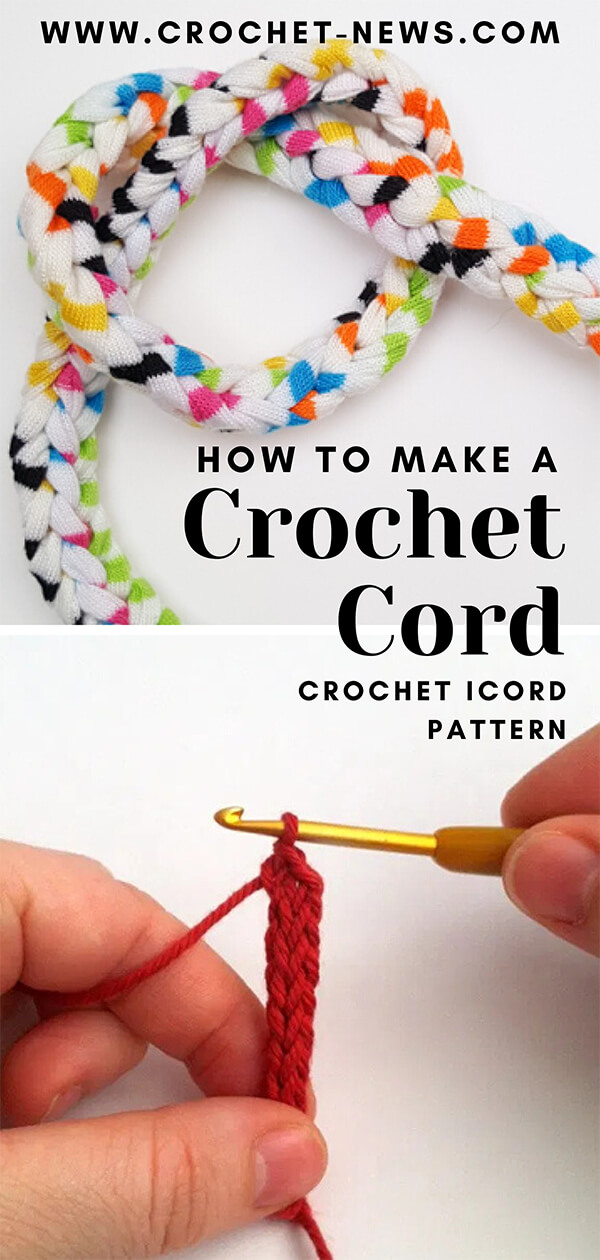
Crochet An Icord - If you need to add some sturdiness to a clothing strap, tote handle or. A nice handle just makes it so much easier to carry around. Need the left handed version? Once you know how it's done though, you'll be so glad you learned how. The wider you go the easier it is to accidentally pull out loops and it becomes more flat and less like a tube because. To start, chain (ch) 3.step 1: I hope you enjoy this video tutorial. Link for more details is below.for more information on how i created this stitch plus a pattern, includin. It is made in the same way as this tutorial explains, the only difference will be that the starting chain will have 2 chain stitches instead of 3. Thicker with more loops, fewer loops, and also super thin. Handles also are the perfect finishing touch to any bag or basket. Web step 6 onwards: Often used for the handles on a bag or cords to tie on a hat or hood. Typically people do the pinch method to hold the stitches while working a crochet i cord. Insert the hook in the second chain from the end, yarn over and pull. Once you know how it's done though, you'll be so glad you learned how. If you need to add some sturdiness to a clothing strap, tote handle or. Beyond 4 i suggest just actually crocheting in the round. Web finishing the icord crochet by littleconkers.co. Doing this smoothly might take some practice, but i’ve got two tips to help you. Often used for the handles on a bag or cords to tie on a hat or hood. Web finishing the icord crochet by littleconkers.co. Stitched up to look like a series of chains, its easy to do with just a bit of practice! Web step 6 onwards: Drop 2 loops from hook. Don’t you just love adding handles to bags and baskets? If you need to add some sturdiness to a clothing strap, tote handle or. Happy crochet!here's the written instructions ?. The process of taking them off a hook can not only be a little bit awkward, but it can also cause tension issues or even make the loops come undone.. The wider you go the easier it is to accidentally pull out loops and it becomes more flat and less like a tube because. Support your indoor plants with handmade hangers. Handles also are the perfect finishing touch to any bag or basket. Gather your materials and crochet along with us as we learn how to crochet an icord. In. Like any new stitch technique, learning this crochet skill will take a bit of practice. In this video tutorial i will show you three different ways that you can work the attached crochet i cord using other materials. Typically people do the pinch method to hold the stitches while working a crochet i cord. As with most things in live. As with most things in live there are different ways that you can accomplish the crochet i cord. So, think 2, 3, or possibly even 4 stitches in the round. If you need to add some sturdiness to a clothing strap, tote handle or. Once you know how it's done though, you'll be so glad you learned how. A nice. Get creative with bracelets and necklaces. Need the left handed version? It has infinite applications from handles, to straps to jewelry. Once you know how it's done though, you'll be so glad you learned how. A nice handle just makes it so much easier to carry around. Get creative with bracelets and necklaces. The process of taking them off a hook can not only be a little bit awkward, but it can also cause tension issues or even make the loops come undone. In fact, it's quite simple. Insert hook into 2nd ch from hook, yarn over and draw up a loop, insert hook into next ch,. Insert the hook in the second chain from the end, yarn over and pull. Insert hook into 2nd ch from hook, yarn over and draw up a loop, insert hook into next ch, yarn over and draw up a loop (3 loops on hook). As with most things in live there are different ways that you can accomplish the crochet. I hope you enjoy this video tutorial. The wider you go the easier it is to accidentally pull out loops and it becomes more flat and less like a tube because. So, think 2, 3, or possibly even 4 stitches in the round. Drop 2 loops from hook. Once you know how it's done though, you'll be so glad you. Happy crochet!here's the written instructions ?. In this video tutorial i will show you three different ways that you can work the attached crochet i cord using other materials. Handles also are the perfect finishing touch to any bag or basket. Get creative with bracelets and necklaces. It is made in the same way as this tutorial explains, the only. Web step 6 onwards: Like any new stitch technique, learning this crochet skill will take a bit of practice. It has infinite applications from handles, to straps to jewelry. Link for more details is below.for more information on how i created this stitch plus a pattern, includin. In fact, it's quite simple. I hope you enjoy this video tutorial. The wider you go the easier it is to accidentally pull out loops and it becomes more flat and less like a tube because. Get creative with bracelets and necklaces. Typically people do the pinch method to hold the stitches while working a crochet i cord. Beyond 4 i suggest just actually crocheting in the round. Web crochet attached i cord. Drop 2 loops from hook. As with most things in live there are different ways that you can accomplish the crochet i cord. Don’t you just love adding handles to bags and baskets? The process of taking them off a hook can not only be a little bit awkward, but it can also cause tension issues or even make the loops come undone. Handles also are the perfect finishing touch to any bag or basket.
How to Crochet an Icord Crochet Stitch Tutorial Crafting for Weeks

How to Crochet an ICord YouTube
How to Make a Crochet Icord with Patterns To Try Crochet News

How to crochet an icord Little Conkers

How to Crochet an ICord

How to crochet an ICord Left Handed YouTube

How to crochet an iCord with the easiest way YouTube

How to Crochet an ICord

How to Crochet an Icord Crochet Stitch Tutorial Crafting for Weeks

How to Crochet an ICord
Support Your Indoor Plants With Handmade Hangers.
Web Finishing The Icord Crochet By Littleconkers.co.
It Is Made In The Same Way As This Tutorial Explains, The Only Difference Will Be That The Starting Chain Will Have 2 Chain Stitches Instead Of 3.
Doing This Smoothly Might Take Some Practice, But I’ve Got Two Tips To Help You.
Related Post: